Data maps
Data map extensions represent the generalized mapping between two object definitions. For more details on Data maps, refer to Data map extensions.
The Data maps editor
The Data maps editor features the following:
- Selector for choosing the Data Map within the context process.
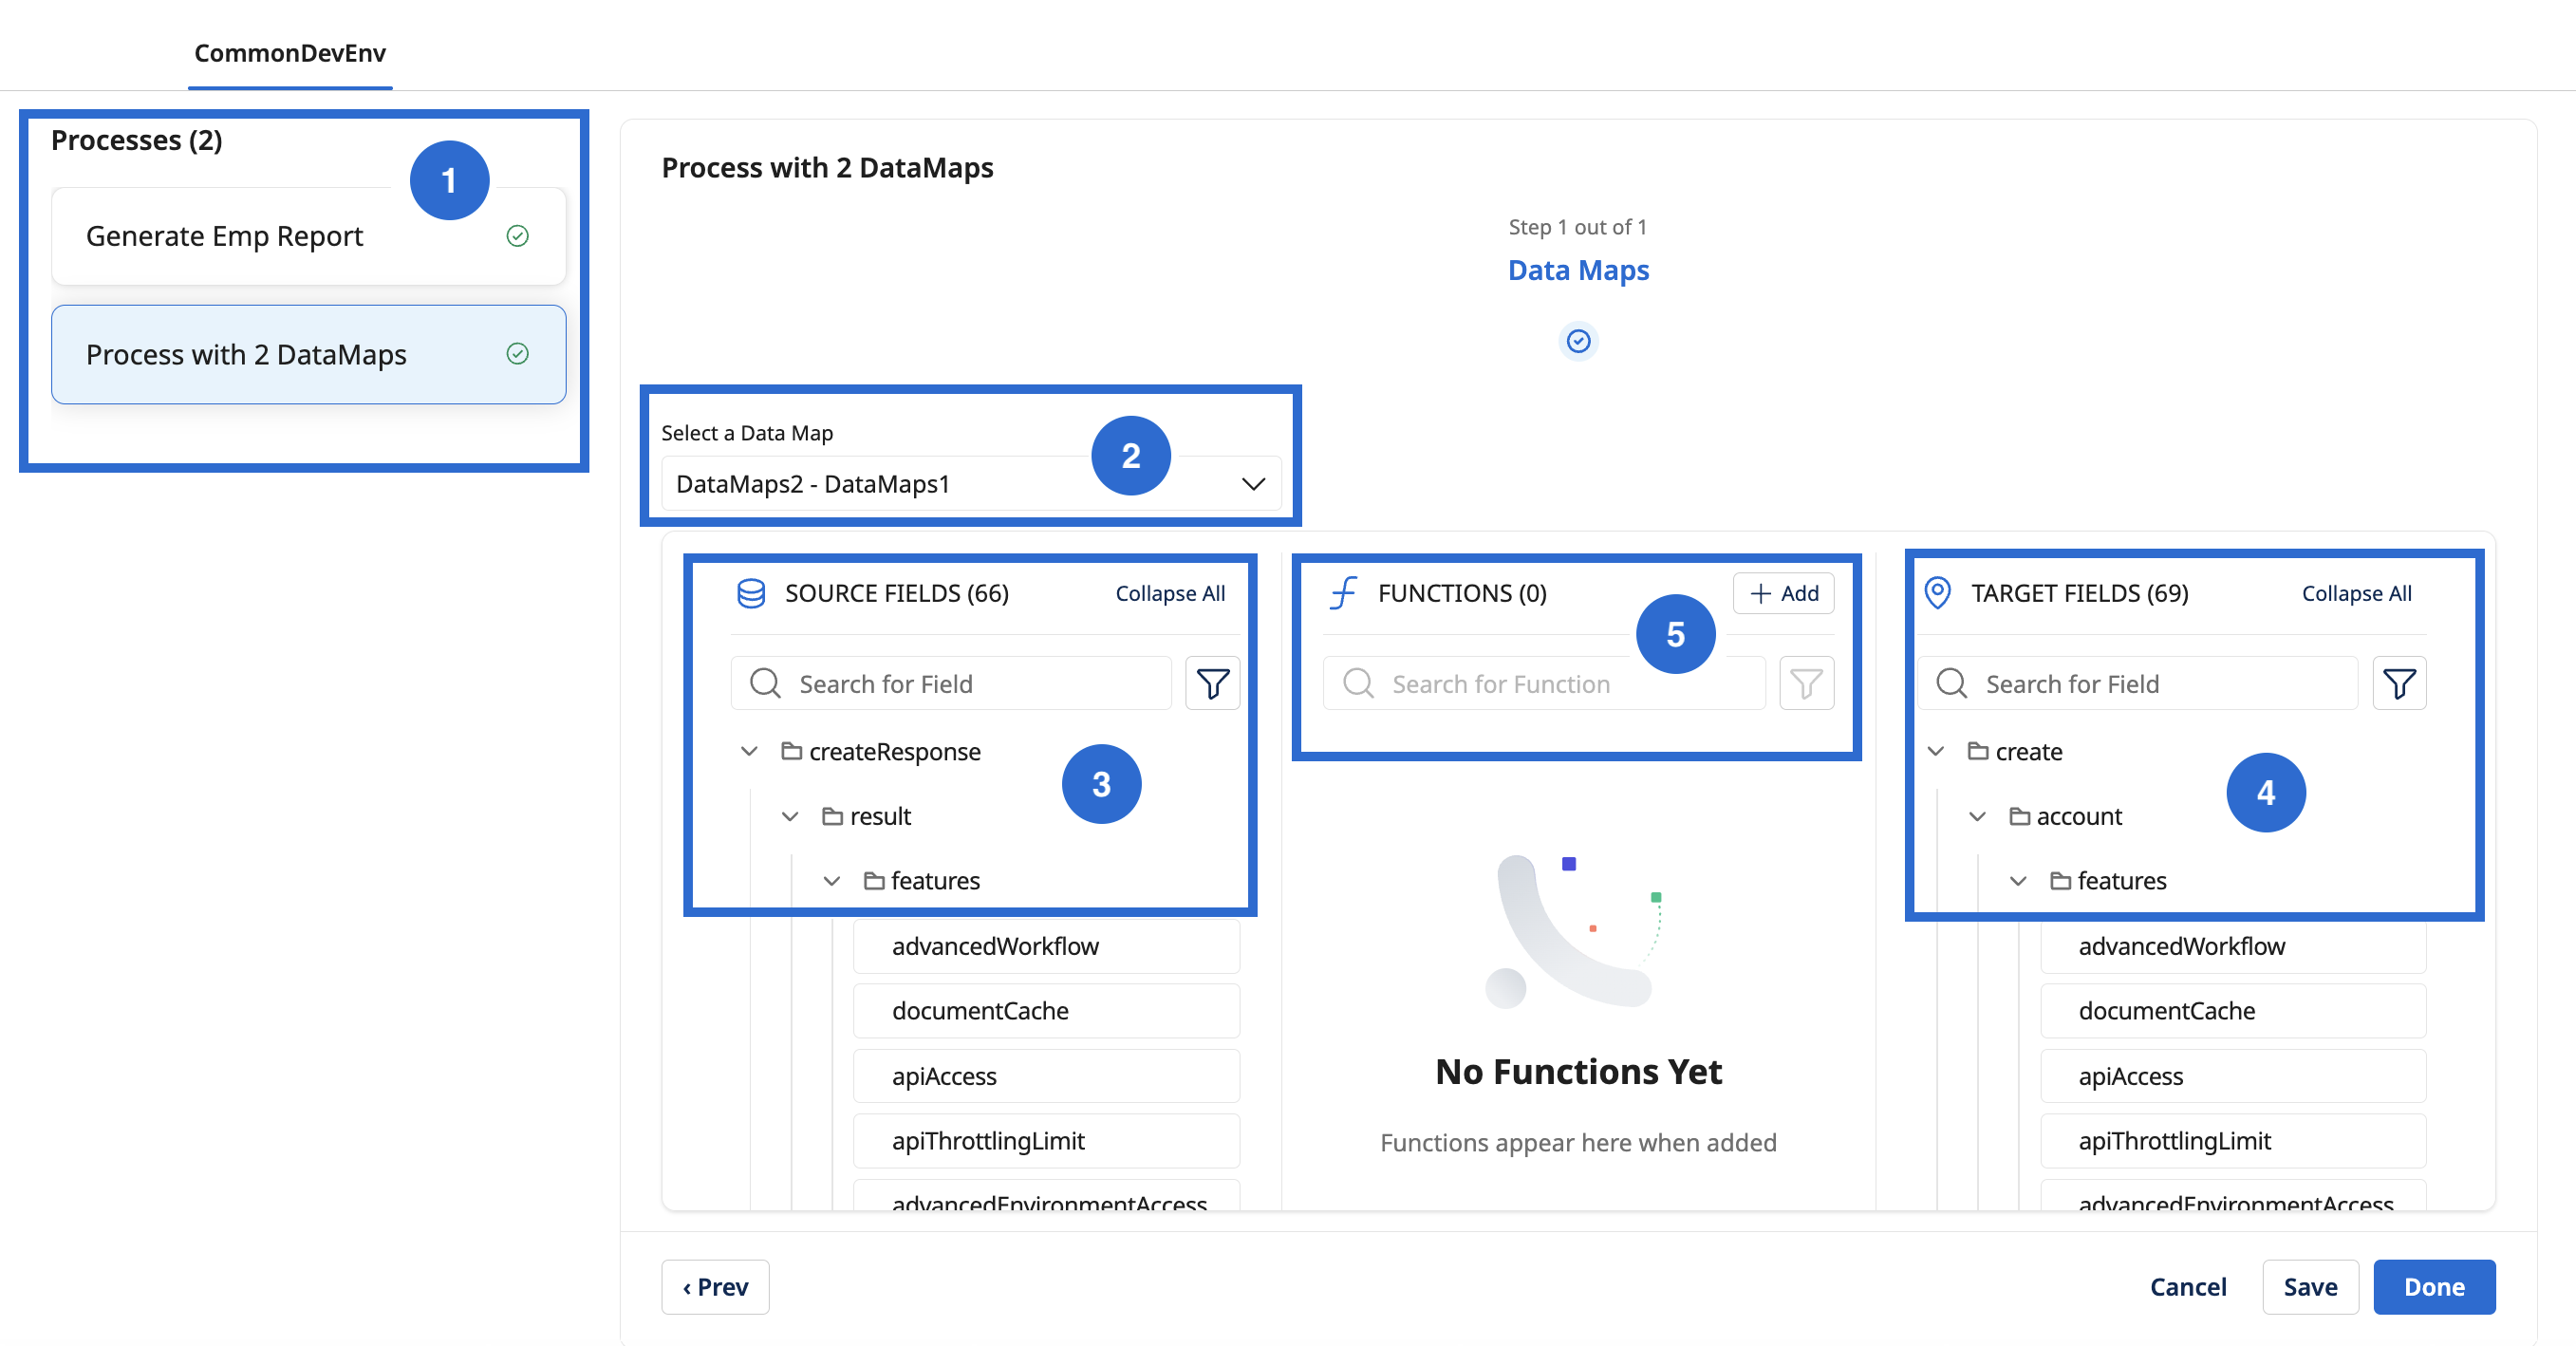
- SOURCE FIELDS: This section displays the set of input fields included as part of the Data map.
- TARGET FIELDS: This section displays the set of output fields included as part of the Data map, to which the SOURCE FIELDS can be transformed.
- FUNCTIONS: In this section, you can add the transformation functions for your input. You can currently perform transformation on the following categories:
- String: Includes String operations like trimming, appending, concatenation, case conversion, and so on.
- Numeric: Includes basic arithmetic operations, floor operation, formatting, and so on.
- Date: Includes options to format the date and get the current date.
- Lookup: Includes simple lookup option for key-value pairs that you add.
To edit the Data map:
-
Select a process for the Data map transformation from the left pane.
-
Select the Data map to use from the selected process. Based on the Data map selection, the system populates the source fields, functions, and target fields in their respective sections.
noteThe mapping configuration of the selected Integration process determines which fields and functions gets displayed in the mapping editor.
-
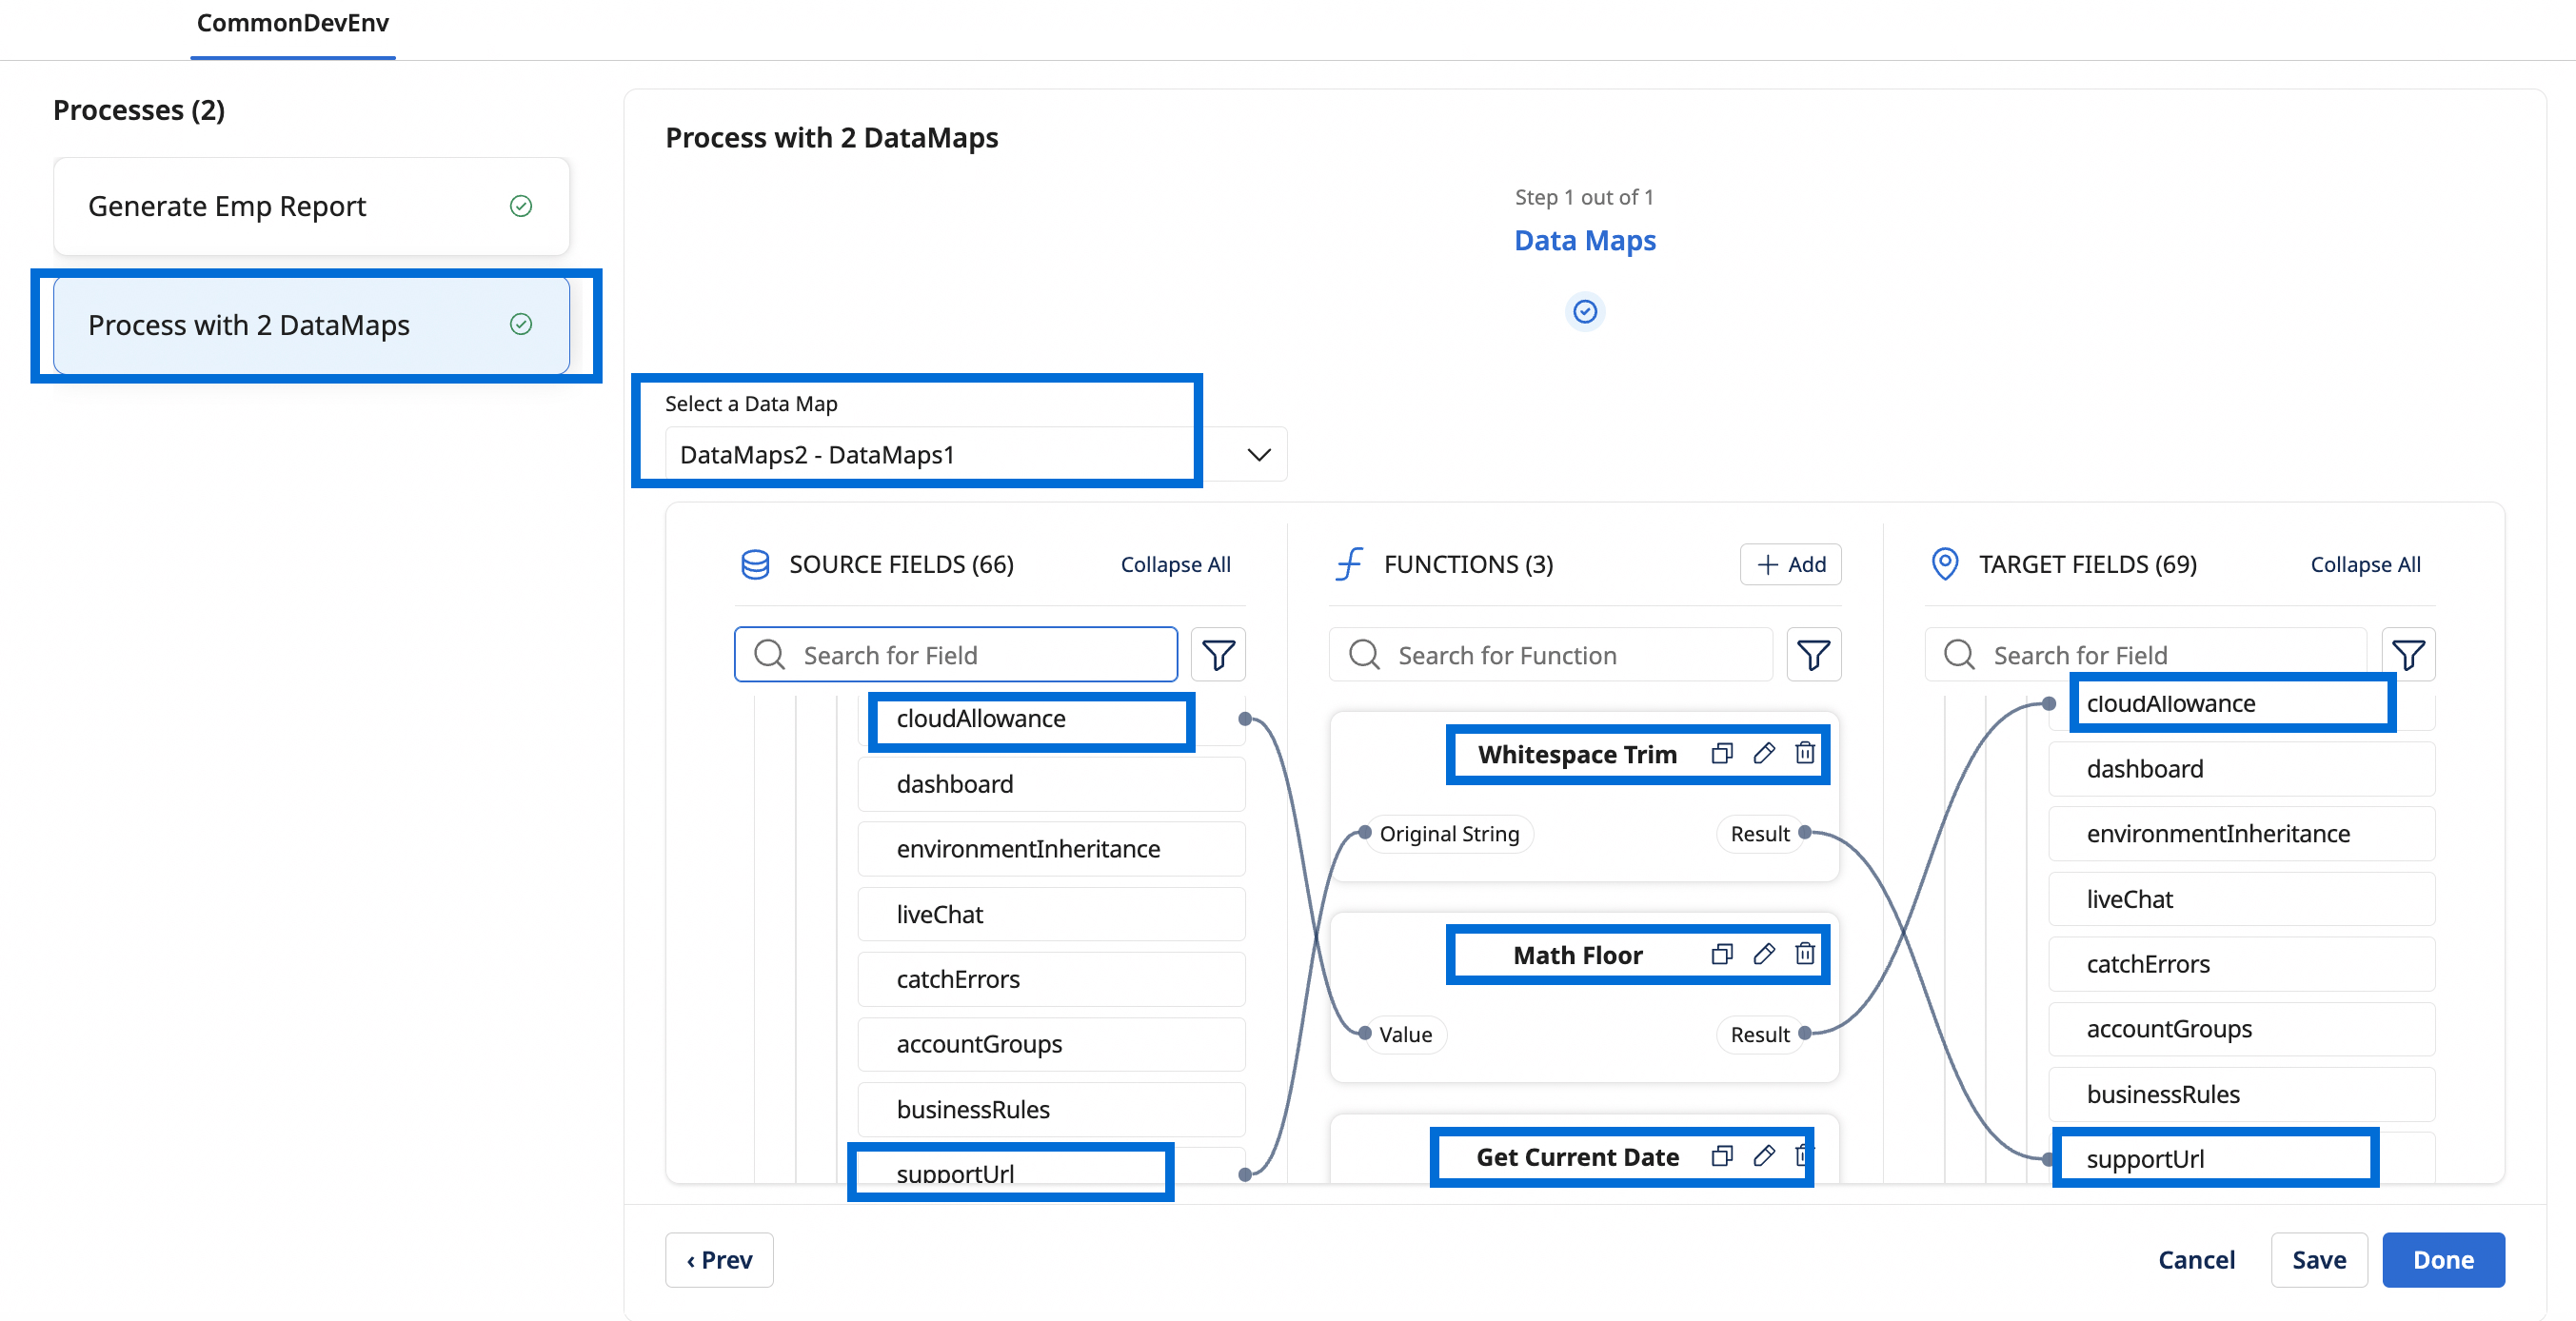
To directly map a source field to a target, drag the source field to the target field.
-
To transform one or more source fields to a target field, using a String transformation function:
- Click Add under the FUNCTIONS section. The Add a Function page opens.
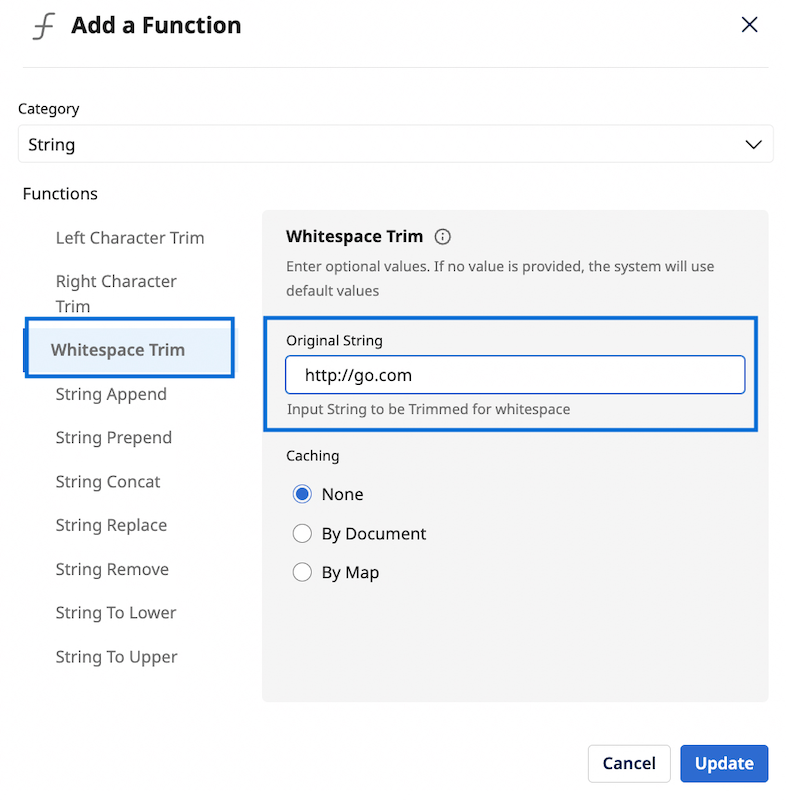
- Select String for Category.
- Select a String Function, for example, Whitespace Trim.
- Provide the Original String that needs to be transformed and click Add.
- After adding a function, drag a source field to the input field of the function created in step 4. In the same way, drag the output field to the target field.
Similarly, you can add functions for data transformation of Numeric and Date data types or for Simple Lookup.
- Click Add under the FUNCTIONS section. The Add a Function page opens.
-
Click Next on the installation wizard to complete the process.
- You can directly map a source field to a target field without applying any function.
- To undo a mapping, click the blue dot highlight on the source or target field.
After completing the map configuration, check out the Next Steps to complete the configuration process.
